
The Dynamic module will allow you to send an EIDO patient education article directly to your patient.
The difference with this module is that the article is unique to the patient. This means you will know if the patient has read the article and how long they spent reading it.
Finding the patient
To send an education article to a patient, first search for and select the patient from the list on the left hand side of the dashboard patients page.
Once you have selected the patient from the list you will see their details in the right-hand pane. Before proceeding, double check that the details match those of the patient you intend to send the article to.
Search for the procedure
Select the “Start Consent” button in the patient timeline, or Options > Start Consent. Search for the procedure the patient is having. You can type in the name of a procedure, a custom procedure or the article code.
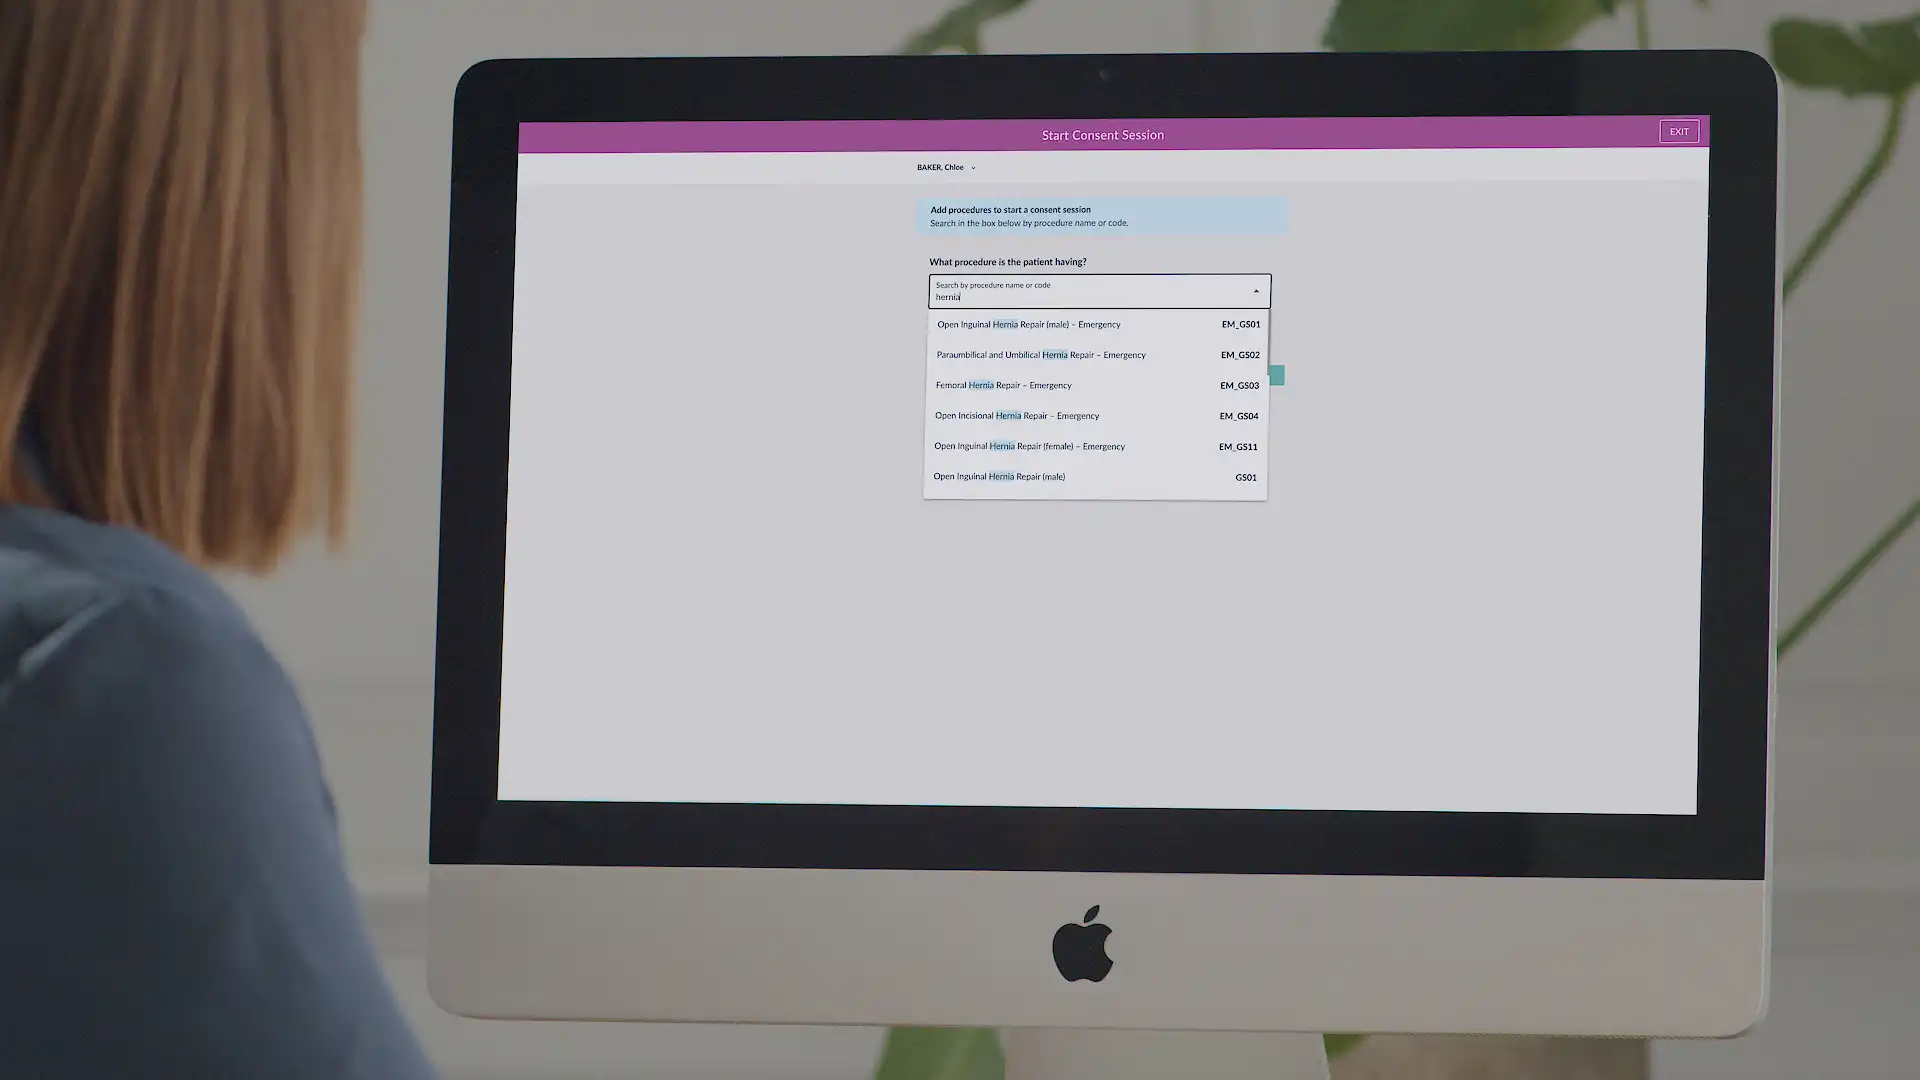
For example: “hernia” will bring up all available procedures for hernias. Or an EIDO document code such as GS11 will bring up the ‘Open Inguinal Hernia Repair (female)’ article.
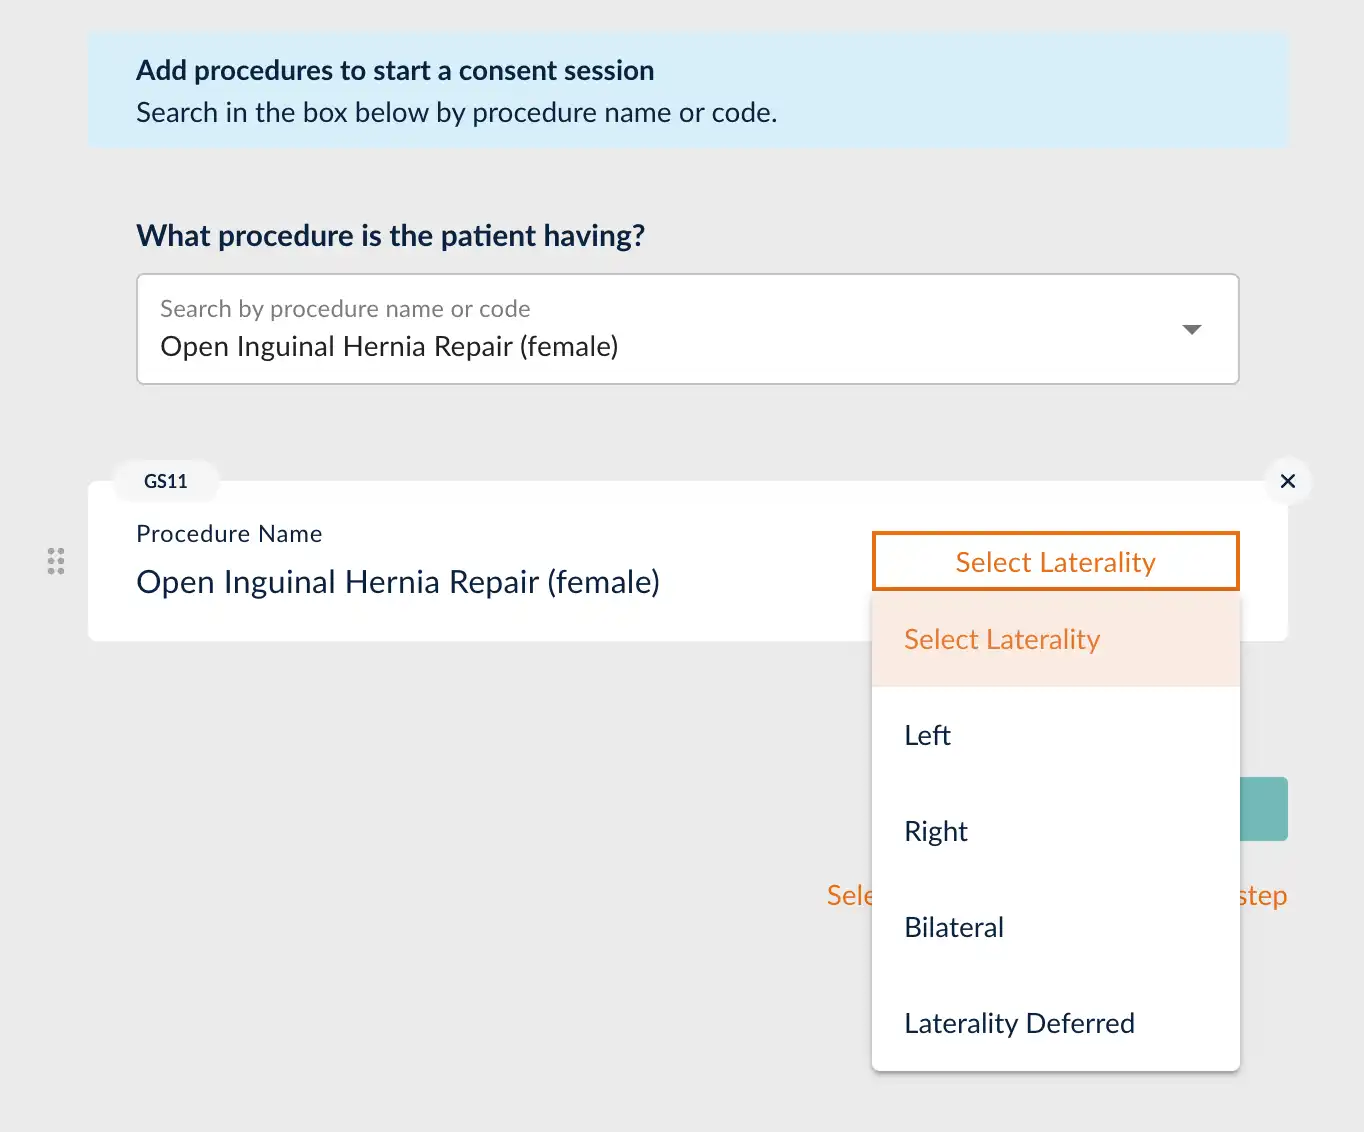
If the chosen procedure has a laterality component, please specify this now before moving on.
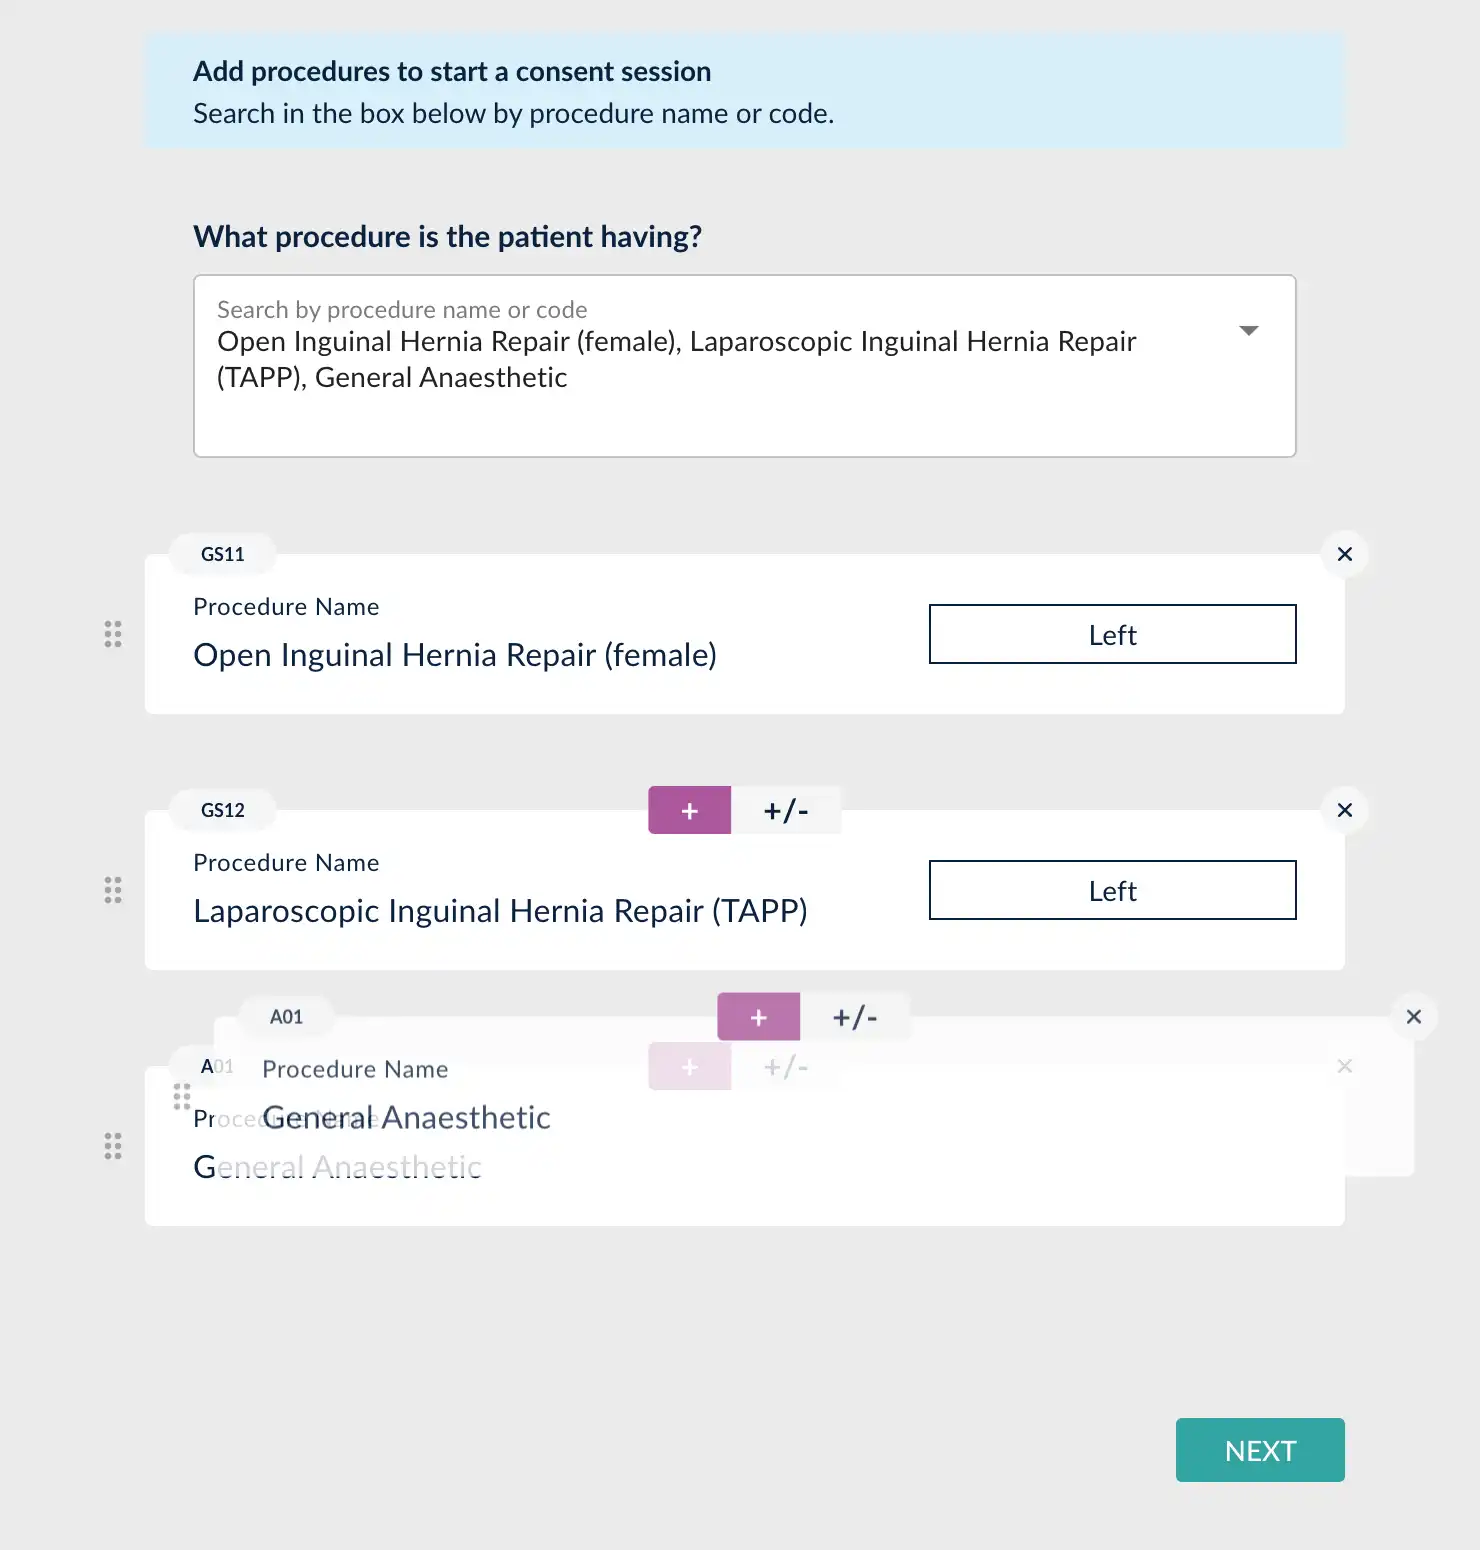
It is possible to choose multiple procedures to send to the patient. Keep searching and adding them to the list. The order of procedures in the list can also be changed by click-dragging up and down, as shown in the image below.
Extra Procedures
An extra procedure is something that may be done during surgery, where the risks are exceedingly minor when compared to the index procedure. An example is ‘removal of polyp’ during a colonoscopy.
List any extra procedures if required and indicate whether these are additional or optional using the + and ± buttons.
Article or Consent or Both
At this stage, we can just send an article to the patient. We could create a consent form session for this patient. Or we can create both.
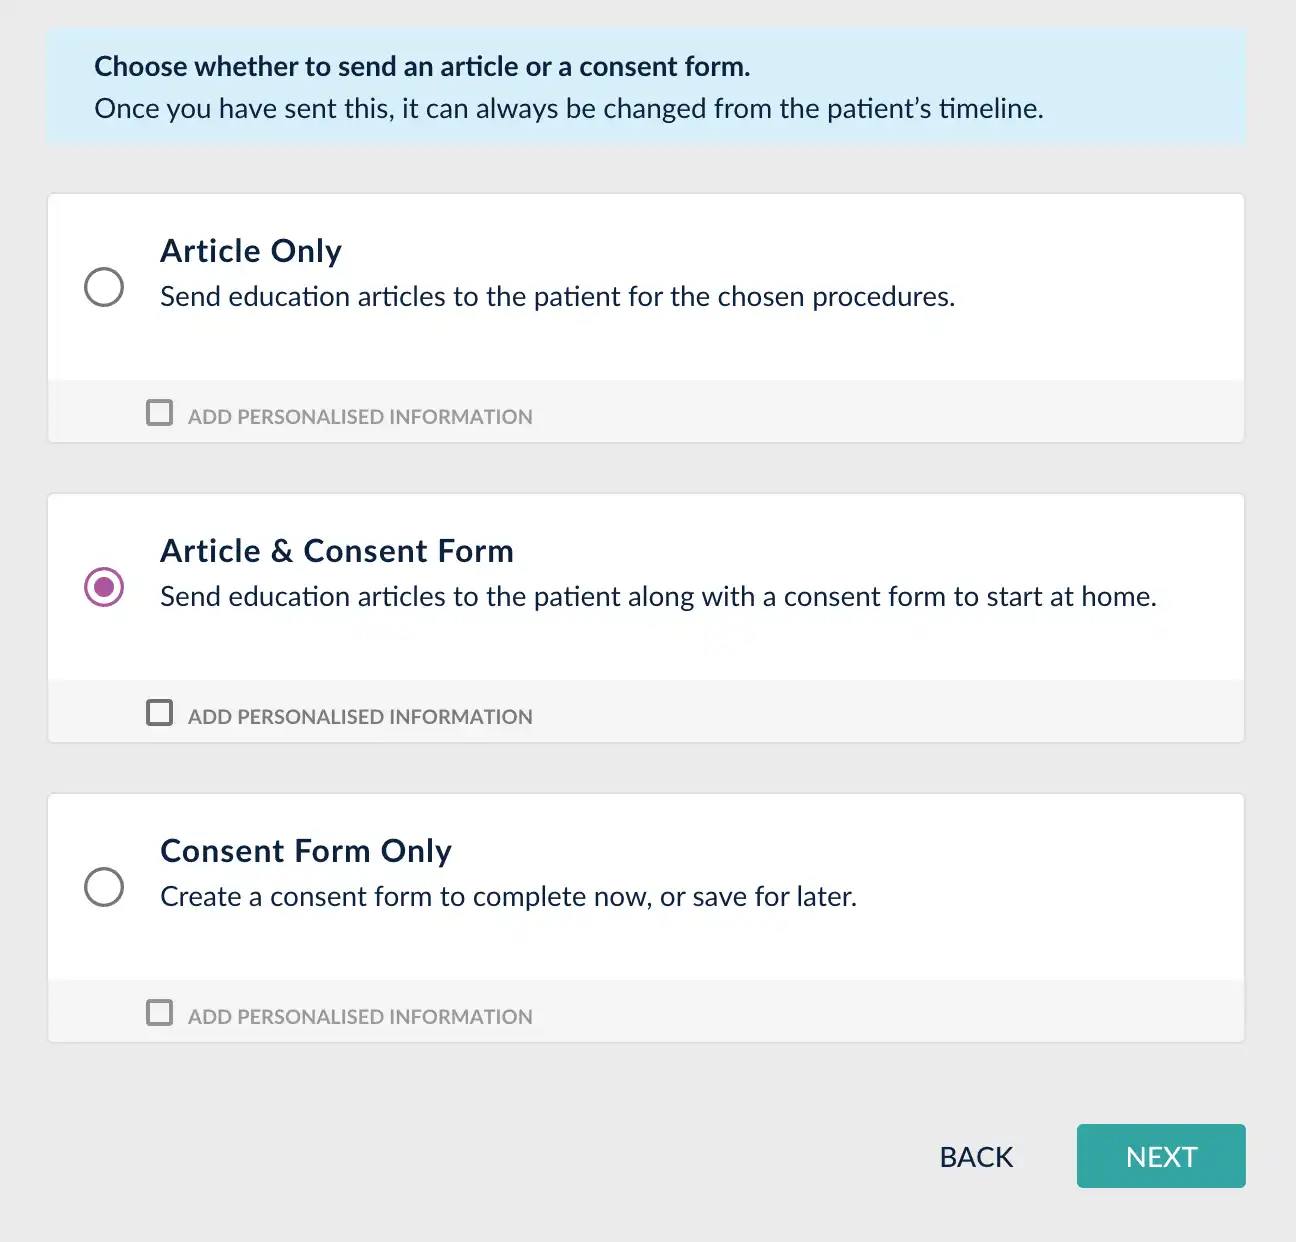
Note that there is an option for Personalised Information. See our separate article about the Personalised Information feature.
Assuming you choose Article & Consent form, the next screen will give you the choice of all available consent forms for your organisation.
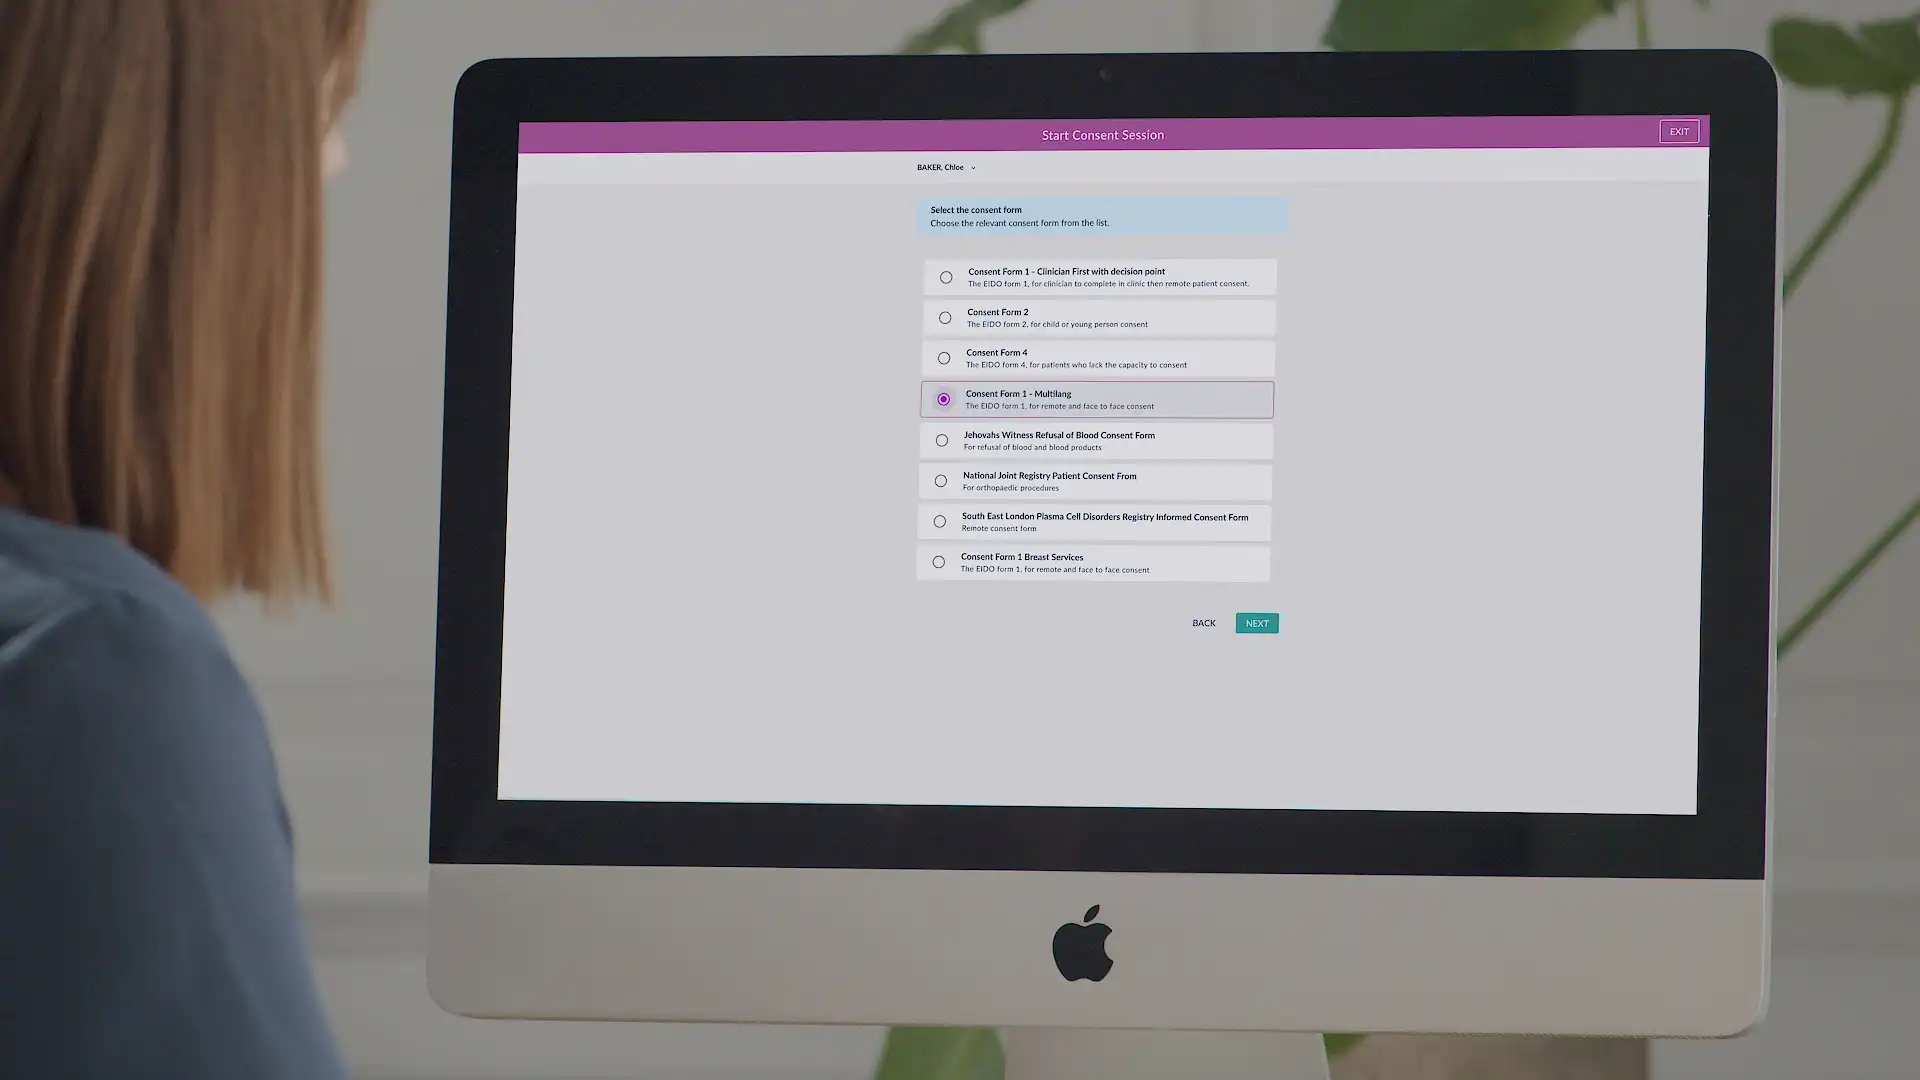
Once you have chosen a consent form type, the session is ready to start.
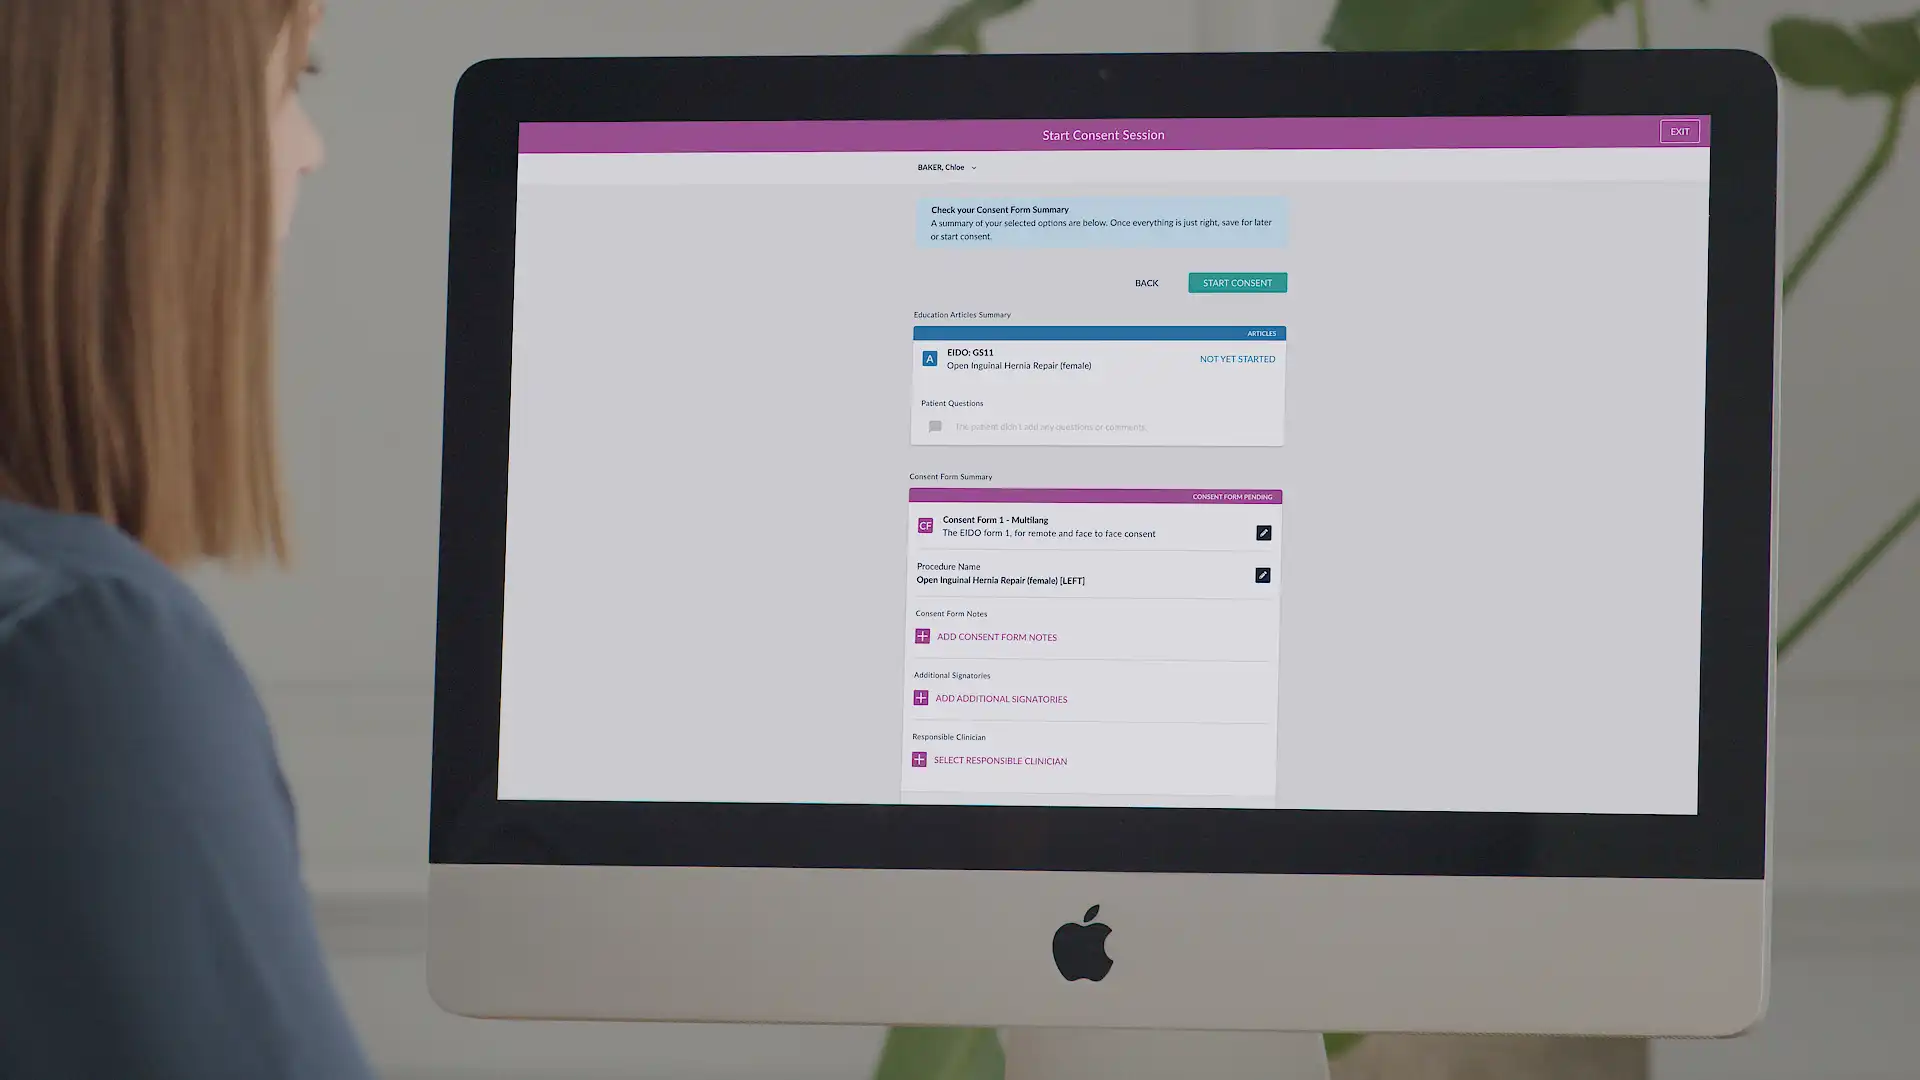
Notes, Additional Signatories and Responsible Clinician
On this summary screen, there is also the option to add notes for the patient, to specify any additional signatories such as a witness or interpreter and finally specify a responsible clinician for this consent form.
Once you are happy with the session setup, select the START CONSENT button from the top or bottom of the page.
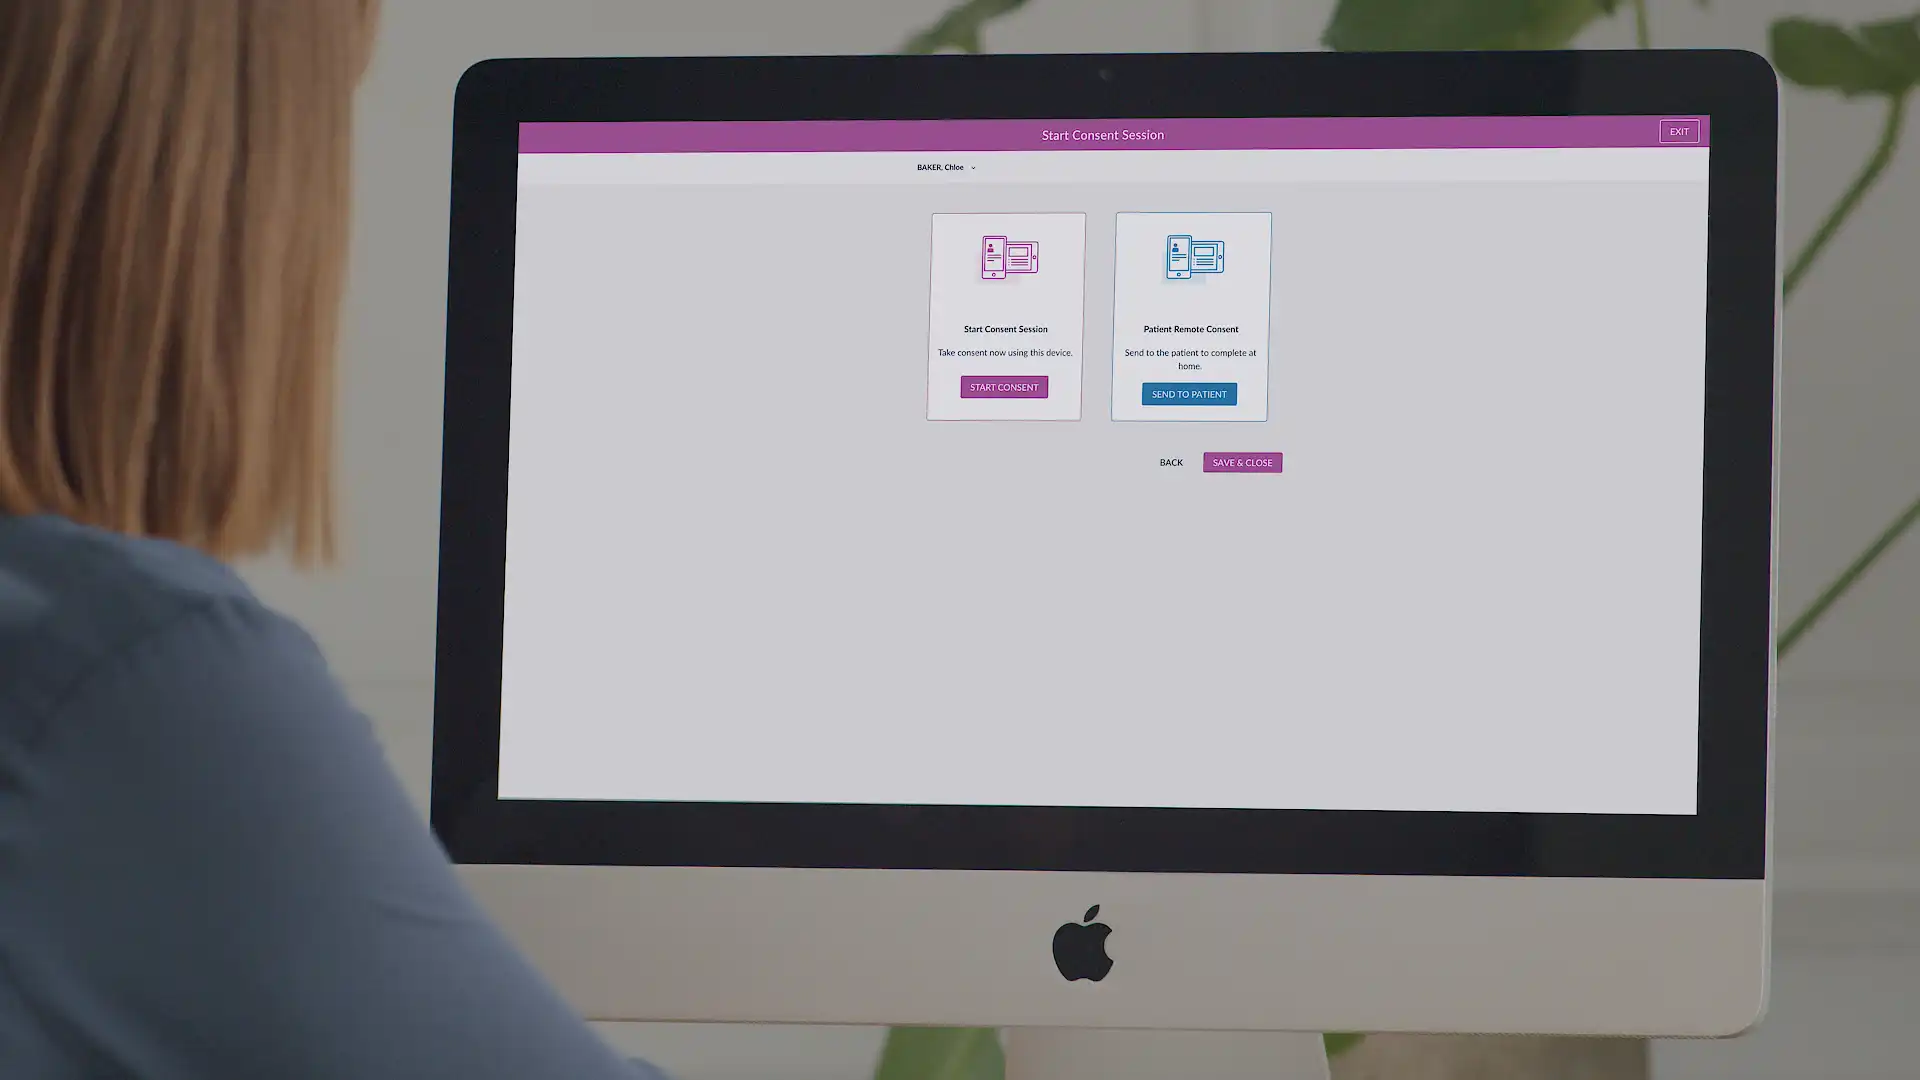
If you need to consent first, or want to consent the patient straight away, choose the left option of ‘Start Consent Session’. If you would like to send this consent session to the patient at home, select the ‘Patient Remote Consent’ option.
The system will send an email to the patient, but if there is no email address, an SMS will be sent.
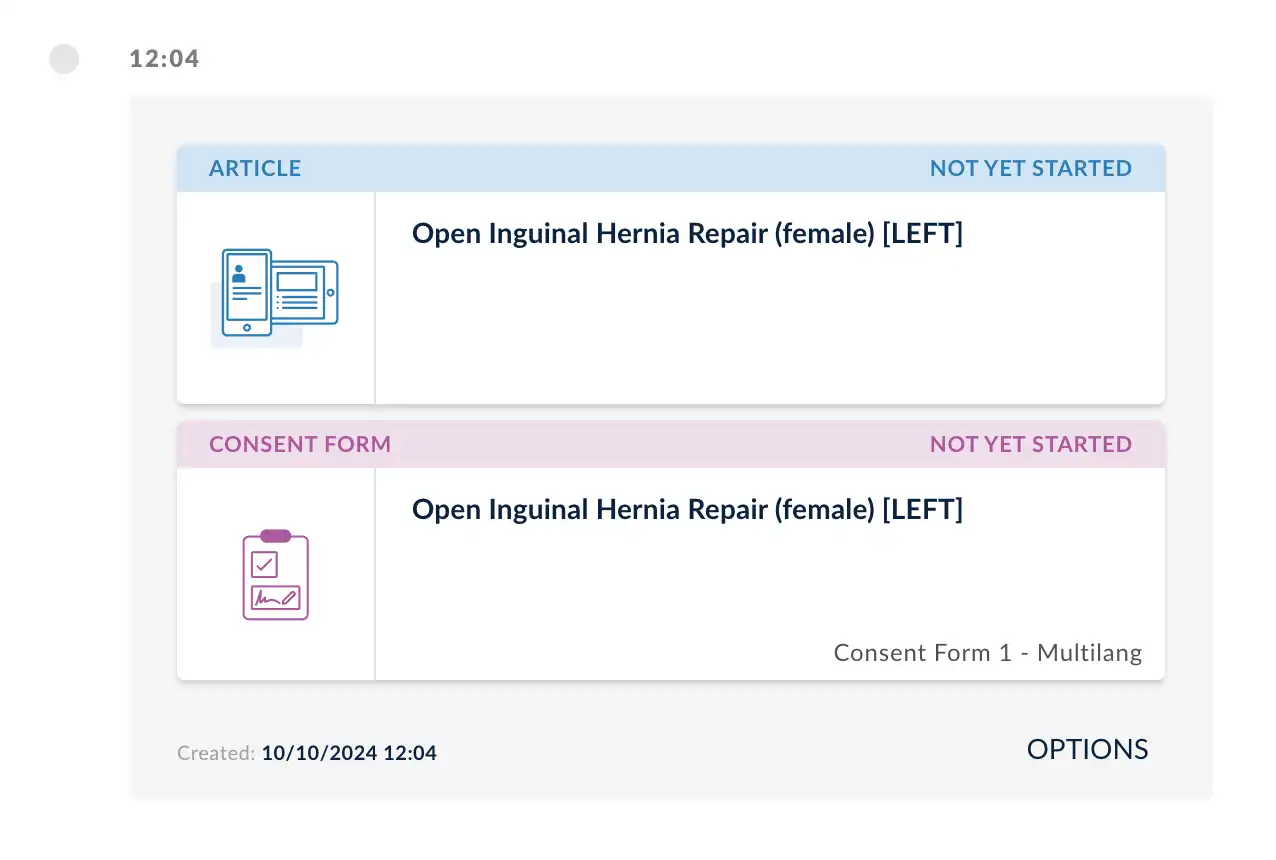
In the patient timeline, there is now a card for the Hernia Repair we just sent. This is has a status in the top right of “Not Yet Started”. This shows that the patient has not yet opened the article.
Patient’s with no contact information
In some cases, a patient may not have an email address or mobile phone number in the system. Education articles and consent forms cannot be sent to them. We have a separate article to show how these patients are handled. No Contact Information Article